You spent hours on the color grade. The cuts are tight. The pacing is exactly right. Then someone watches it and says: “The audio sounds a little off.”
And just like that, the whole thing unravels.
Video editors obsess over visuals, which makes sense, it’s a visual medium. But audio is doing at least half the emotional work in any edit, and most editors treat it like an afterthought. The truth is, bad audio kills good video. Viewers will forgive shaky footage before they’ll forgive muddy dialogue or a music track that drowns everything out.
Here are the three audio fixes that will immediately make your edits sound more professional, and the tools to get there.
Fix 1: Get Your Levels Right
Inconsistent audio levels are one of the most common giveaways of an amateur edit. One moment the interview subject is too quiet, the next the background music is overwhelming the dialogue. Viewers shouldn’t have to adjust their volume, that job belongs to you in post.
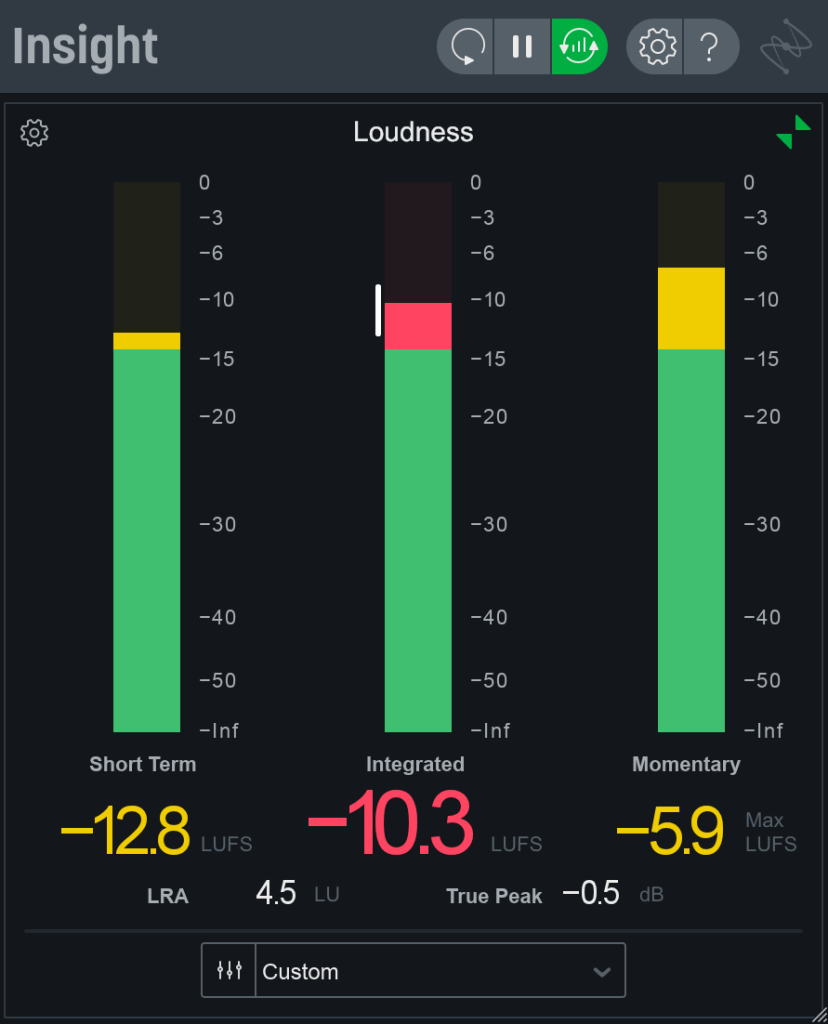
The standard to know here is LUFS (Loudness Units Full Scale). The industry measurement for perceived loudness. For YouTube and most online platforms, aim for around -14 LUFS for your overall mix. For broadcast, the standard is closer to -23 LUFS. Getting this wrong doesn’t just sound unprofessional, platforms like YouTube will automatically normalize your audio, and if you haven’t mixed to a target, the result can be unpredictable.
A good starting framework: dialogue sits in the center of your mix, music sits underneath it (typically 10–15 dB lower than your dialogue peak), and sound effects fill the space around both. Clipping — when audio exceeds the maximum level and distorts should be avoided at all costs. It’s one of the clearest signals that audio wasn’t given proper attention.
Fix 2: Use Room Tone
If you’ve ever watched a rough cut and noticed a weird “silence” between dialogue cuts, a kind of dead, hollow gap, you’ve experienced what happens when room tone is missing.
Room tone is the ambient sound of a location when no one is speaking: the hum of an air conditioner, the distant sound of traffic, the acoustic fingerprint of a room. Every space has one, and when you cut between takes without it, the audio bed jumps in a way the viewer’s ear immediately registers, even if they can’t name why.
The fix is simple: always record 30–60 seconds of room tone on any shoot before wrapping. In post, lay it as a continuous bed underneath your dialogue track to smooth transitions between cuts. It’s one of those invisible elements, done right, nobody notices. Done wrong, everybody notices.
No room tone from the shoot? iZotope RX has tools to extract and generate room tone from existing recordings.
Fix 3: Balance Your Music Mix
Music is one of the most powerful emotional tools in an edit, and one of the easiest to misuse. Too loud and it competes with dialogue. Too low and it feels like an afterthought. The music mix is where many editors rush, and viewers feel it even when they don’t consciously notice.
A few principles that help: use automation to duck music during dialogue, not just set a static level. Let the music breathe in the moments between words. Aim for consistent loudness across your entire mix. EQ and compression are your tools here, not just the volume fader.
For editors working entirely inside their NLE, Adobe Audition integrates directly with Premiere Pro and offers broadcast-quality audio tools without requiring a full DAW workflow. For a free option, Audacity remains one of the most capable open-source editors available and handles multi-track mixing well for most video projects.
The Bottom Line
Great audio is invisible. Nobody watches a polished video and thinks “the audio was clean”. they just feel engaged, comfortable, and present in the edit. But bad audio announces itself immediately, and no amount of visual polish recovers from it.
The three fixes above, targeting your LUFS, laying room tone, and balancing your music mix. adobe audare not advanced techniques. They’re fundamentals that separate editors who take audio seriously from those who don’t.
Your visuals earned the attention. Don’t let the audio lose it.
What’s your go-to audio tool in your editing workflow? Drop it in the comments below.

Leave a comment